In order to create a variety of vivid and intricate designs, underglaze recipes are compositions of ceramic pigments and Other materials added to pottery before the glaze is applied.
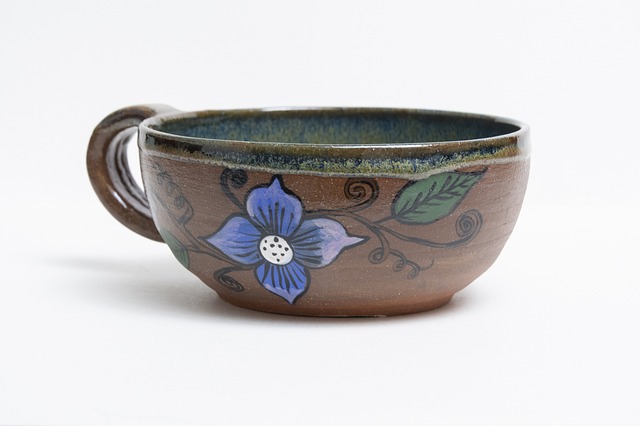
For thousands of years, ancient civilizations including Mesopotamia, Egypt, and China have produced ceramic art. Underglaze is a fundamental ceramics process that enables artists to embellish pots with detailed and vibrant motifs.
In this post, we’ll delve into the fascinating part of underglaze recipes and see how they can infuse your ceramics with color and inventiveness.
What Is Underglaze?
A layer of ceramic pigment is put to the surface of the pottery before applied the glaze in the ornamental method known as underglaze in ceramics. The underglaze is typically applied to the unfired or “greenware” stage of the ceramic work and applied in a variety of ways, including brushing, dipping, and spraying. Following the application of the underglaze, the pottery is glazed and fired in a kiln to fuse the glaze and pigment to the ceramic surface, producing a long-lasting and vibrant finish.
Underglaze recipes often include a binder, which is a substance that aids in the pigment’s adhesion to the pottery surface, and ceramic pigments, which are finely powdered minerals or oxides that create the color. You can add other resources, such as fluxes and opacifiers to the underglaze recipe to modify its properties and achieve desired effects.
Creating Underglaze Recipes:
In order to experiment with various colors, textures, and effects, ceramic artists can create their own underglaze recipes, which can be a fun and gratifying process. Although underglazes are commercially sold, many artists prefer to produce their own to have more control over the underglaze’s hues and properties. Creating underglaze recipes can be done in the following simple steps:
1. Selecting Pigments:
Ceramic pigments are available in a wide range of colors and you can mix to create custom colors. Pigments can be purchased from ceramic suppliers or obtained from natural sources and then finely ground to create a powder.
2. Choosing a Binder:
The binder is an important component of the underglaze recipe as it helps the pigment adhere to the pottery surface. Common binders used in underglazes include gum Arabic, CMC gum, or fritted feldspar. The binder should be compatible with the clay body and glaze being used.
3. Testing and Adjusting:
Once the pigment and binder are selected, it’s important to test the underglaze recipe on a test piece of pottery. This allows the artist to see how the colors react with the clay and glaze, and make adjustments as needed. Adjustments can be made by adding or subtracting pigment, binder, or other materials to achieve the desired color, opacity, and texture.
4. Experimenting With Effects:
Underglazes can also be used to create various effects on the pottery surface, such as marbling, sgraffito, or stenciling. Experimenting with different application techniques, layering of colors, and textures can result in unique and interesting designs.
Popular Underglaze Recipes:
Underglaze is a type of ceramic decoration technique that involves applying colored pigments or stains onto unfired clay, which is then covered with a layer of clear glaze before firing. This results in a decorative layer that is visible through the translucent glaze.
Here are some popular underglaze recipes for ceramic pottery:
1. Basic Underglaze Recipe:
Ingredients:
- White clay slip or underglaze base
- Ceramic pigment powders or stains
- Water
Instructions:
- Start with a white clay slip or underglaze base. You can purchase commercial clay slips or make your own by mixing white clay with water to create a smooth, pourable consistency.
- Add ceramic pigment powders or stains to the clay slip or underglaze base. The amount of pigment you use will depend on the intensity of color you want to achieve.
- Mix the pigment thoroughly into the clay slip or underglaze base, ensuring there are no lumps.
- Add water to adjust the consistency of the underglaze to your desired thickness. It should be thin enough to brush or paint onto your pottery, but not so thin that it runs or drips.
- Apply the underglaze to your pottery using a brush, sponge, or other applicator. Allow it to dry completely before proceeding with further glazing or firing.
2. Black Underglaze Recipe:
Ingredients:
- Black ceramic pigment powder or stain
- White clay slip or underglaze base
- Water
Instructions:
- Start with a white clay slip or underglaze base as the foundation for your black underglaze.
- Add black ceramic pigment powder or stain to the clay slip or underglaze base. Adjust the amount of pigment to achieve the desired intensity of black color.
- Mix the pigment thoroughly into the clay slip or underglaze base, ensuring there are no lumps.
- Add water to adjust the consistency of the underglaze to your desired thickness.
- Apply the black underglaze to your pottery using a brush, sponge, or other applicator. Allow it to dry completely before proceeding with further glazing or firing.
3. Blue Underglaze Recipe:
Ingredients:
- Blue ceramic pigment powder or stain
- White clay slip or underglaze base
- Water
Instructions:
- Start with a white clay slip or underglaze base.
- Add blue ceramic pigment powder or stain to the clay slip or underglaze base. Adjust the amount of pigment to achieve the desired shade of blue.
- Mix the pigment thoroughly into the clay slip or underglaze base, ensuring there are no lumps.
- Add water to adjust the consistency of the underglaze to your desired thickness.
- Apply the blue underglaze to your pottery using a brush, sponge, or other applicator. Allow it to dry completely before proceeding with further glazing or firing.
4. Green Underglaze Recipe:
Ingredients:
- Green ceramic pigment powder or stain
- White clay slip or underglaze base
- Water
Instructions:
- Start with a white clay slip or underglaze base.
- Add green ceramic pigment powder or stain to the clay slip or underglaze base. Adjust the amount of pigment to achieve the desired shade of green.
- Mix the pigment thoroughly into the clay slip or underglaze base, ensuring there are no lumps.
- Add water to adjust the consistency of the underglaze to your desired thickness.
- Apply the green underglaze to your pottery using a brush, sponge, or other applicator. Allow it to dry completely before proceeding with further glazing or firing.
5. Brown Underglaze Recipe:
Brown underglaze is a type of ceramic glaze that is applied to pottery before it is fired to give it a brown color. Here’s a simple recipe for making brown underglaze:
Ingredients:
- Red iron oxide
- Ball clay
- Water
Instructions:
- Measure out the desired amount of red iron oxide. The amount will depend on the intensity of the brown color you want to achieve. Start with a small amount, such as 1-2 teaspoons, and adjust as needed.
- Mix the red iron oxide with an equal amount of ball clay in a container. Ball clay is a type of clay that is often used in ceramic glazes and provides a smooth texture.
- Add water to the mixture gradually, while stirring, until you achieve a smooth, creamy consistency. The amount of water needed will depend on the dryness of the clay and the desired thickness of the underglaze. Aim for a consistency similar to thick cream or yogurt.
- Test the underglaze on a piece of scrap clay or pottery to determine if the color is to your liking. Adjust the amount of red iron oxide or water as needed to achieve the desired color.
- Once you’re satisfied with the color and consistency of the underglaze, you can apply it to your pottery using a brush, sponge, or other desired method. Allow the underglaze to dry completely before firing the pottery according to the recommended firing schedule for your clay and glaze.
Note: Different clay bodies and firing temperatures may affect the final color of the underglaze, so it’s recommended to test the underglaze on a sample piece before applying it to your finished pottery. Additionally, always follow proper safety precautions when working with ceramic materials, including wearing a dust mask and working in a well-ventilated area.
Conclusion:
It’s important to note that underglaze recipes may vary depending on the specific clay body, firing temperature, and the desired result. It’s always recommended to test your underglaze recipes on small test tiles or samples before using them on your finished ceramic pieces to ensure the desired outcome. Additionally, always follow proper safety precautions and guidelines when working with ceramic materials and kilns.
Underglazes are popular in ceramics and pottery for creating intricate designs, patterns, and images on the surface of clay or ceramic ware. They offer a wide range of colors and can be used in combination with other glazing and firing techniques to achieve various artistic effects. Underglaze decoration can be found on a wide range of ceramic objects, including dinnerware, vases, tiles, and sculptures.
